
Zonal Delivery - User Manual
Zonal Delivery allows you to manage all of your Delivery Service Providers (DSPs) from one place. It uses Zonal’s iOrder platform to seamlessly integrate orders placed from DSPs to your Aztec tills and other connected devices, significantly simplifying the delivery order process for your employees.
Zonal Delivery has an instinctive interface for efficient navigation and allows for real-time adjustments to the delivery services that you offer from each DSP.
Within Zonal Delivery, you can review an order’s status and history, manage an order’s progress and mark orders as dispatched, all of which seamlessly link into the DSPs own platforms for real-time updates.
This document will outline everything that you need to do to get the best from your Zonal Delivery platform.
Login & Navigation
To begin, log into Zonal delivery using your credentials – these will have been sent to you as part of the onboarding process.
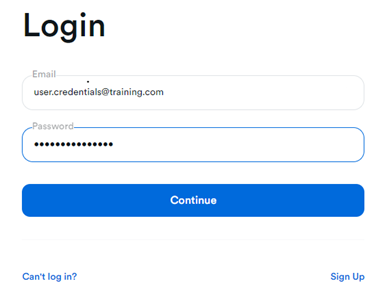
If you are having any issues logging in, select Can’t Log in? from the login page which will assist you in recovering your account.
Once logged in, you will see the dashboard as in the image below; some further explanations follow:
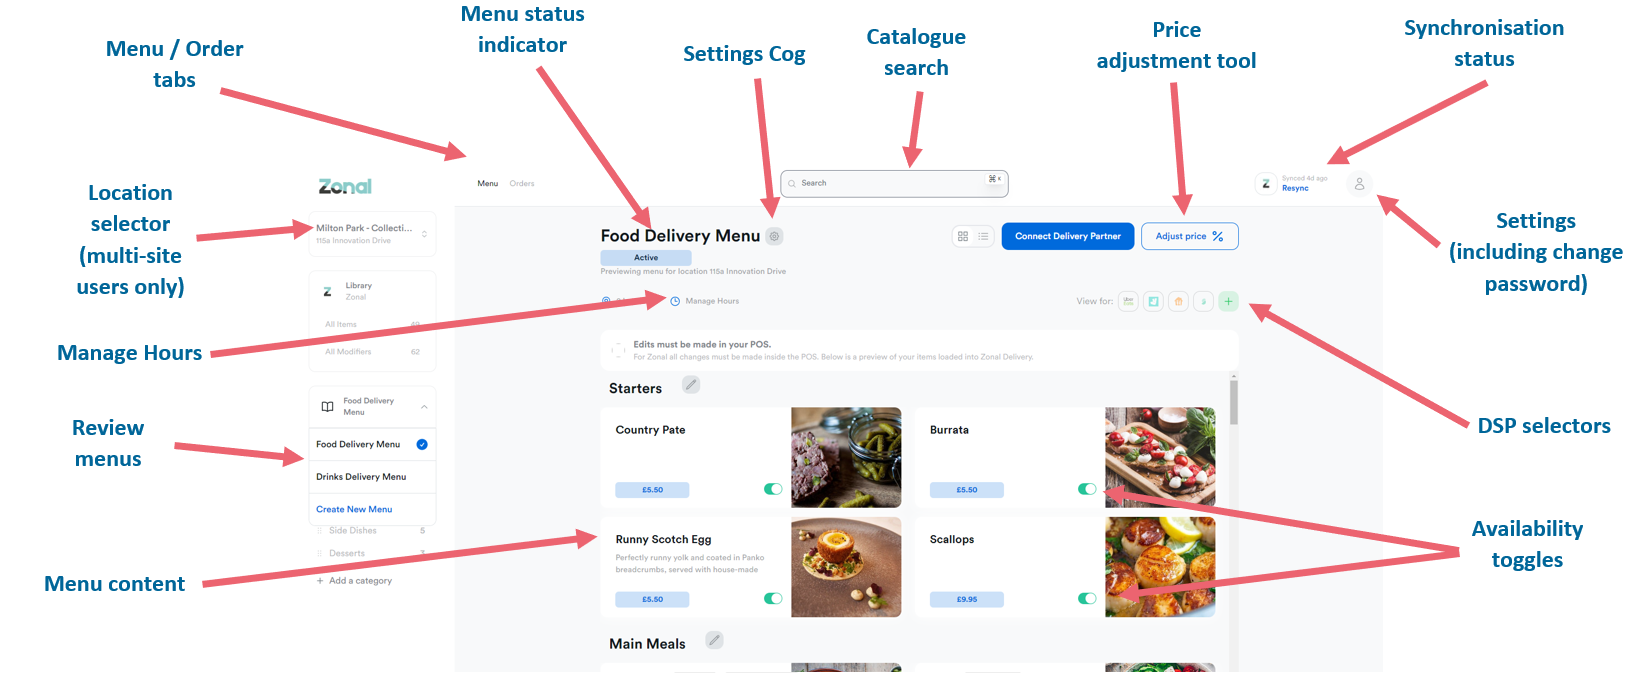
You can click on the Zonal logo in the top left corner to return to the dashboard from anywhere in the platform.

|
Synchronisation Status: Click Resync to refresh the connection to Aztec. If any errors are displayed here, please contact the Zonal Helpcentre or your usual Zonal representative. |
|
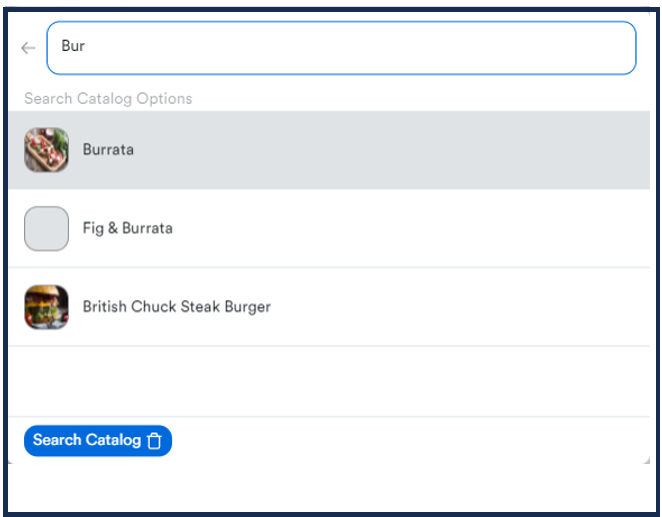
Catalogue search can be used to search for items on a menu that is active on the platform |

|
Settings allows you to reset your login credentials, to change your password and to access an audit trail of actions completed on the Zonal Delivery platform |
|
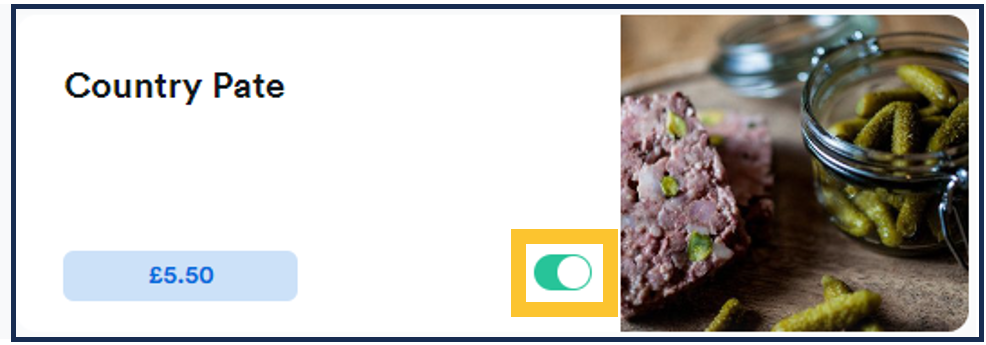
Availability Toggles allow you to remove the visibility of items on a menu in case you have run out of a particular product. |
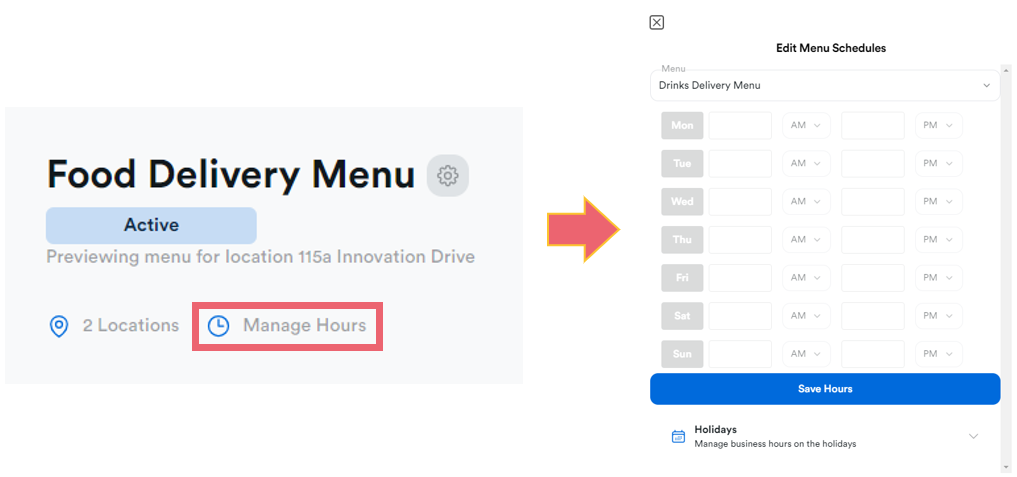
Menu Schedules
Zonal Delivery allows you to quickly maintain menu availability schedules by DSP.
-
From the Dashboard select Manage Hours to begin
- Add the required hours onto each day
- If each day operates the same hours for a menu, select the Copy icon to copy the same operating hours to all other relevant days.
- If you are using Uber Eats as your DSP you can add holidays and exceptions to the standard schedule using the Holidays function at the bottom of the window.
These can be set as either AM or PM, so only use 00:00 to 12:00 as the format.
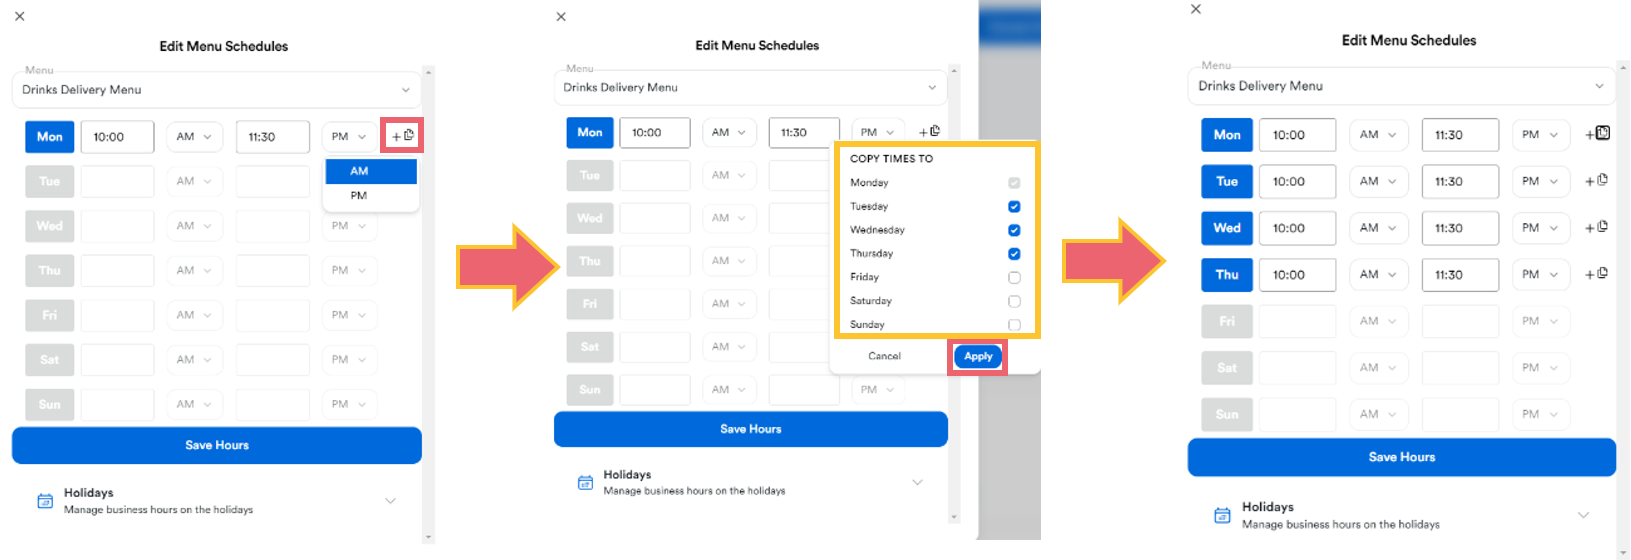
Note that holiday mode is not currently supported by any DSPs other than Uber Eats.
It is necessary to have a schedule created for a menu to be able to publish it, and this does not need to be the same for each DSP.
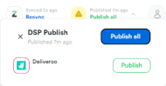
Publishing a Menu
A menu needs publishing from Zonal Connect to make it available on a DSP. You can link a specific menu to each DSP if you have a different offering available for each.
Selecting publish before completing the following steps to link a menu to a DSP will publish all available menus to all available DSPs
-
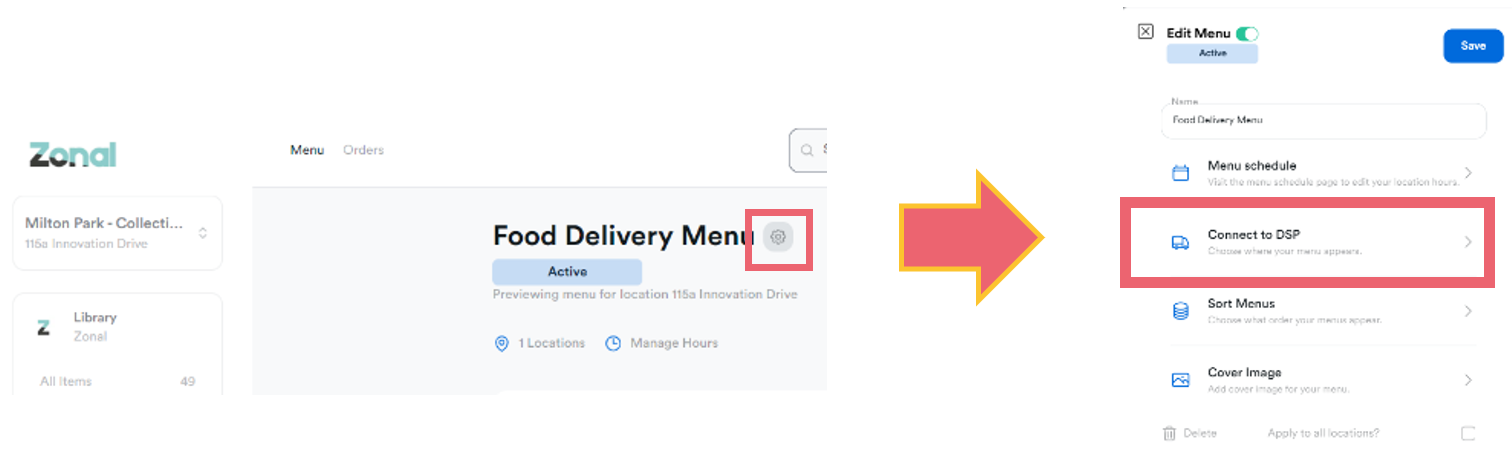
Once the menu has been created externally, navigate to it in Zonal Delivery
-
Select the settings cog to begin editing the menu parameters
-
Choose Connect to DSP from the list.
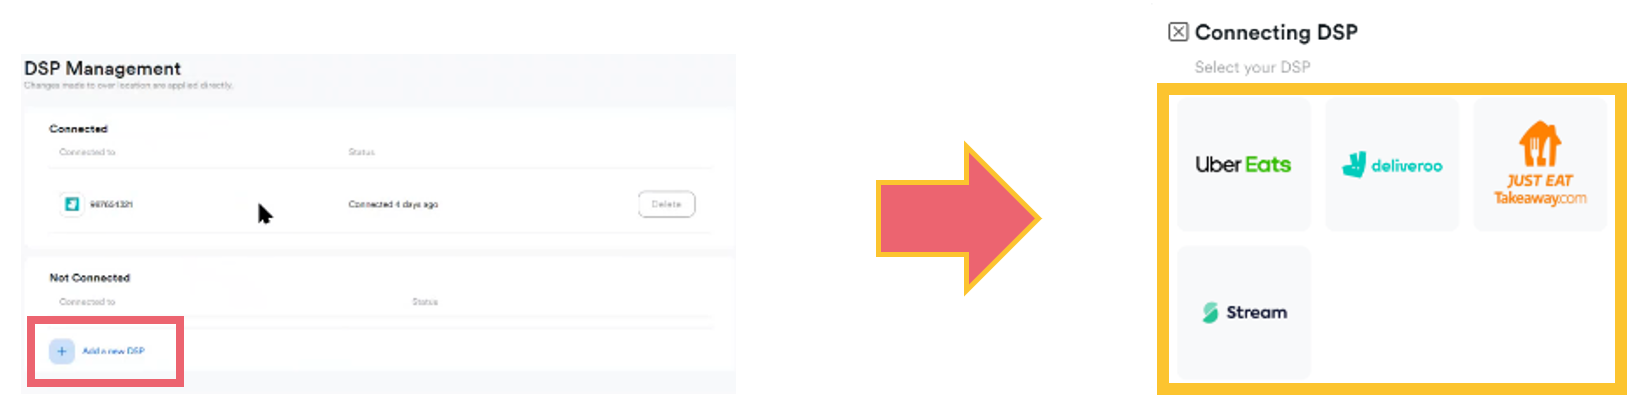
- A list of menus previously published to DSPs will display.
- ClickAdd a new DSP,
- Select the relevant option
- Next, select Connect DSP and enter your Brand ID and Location ID,
- Click Continue.
- Select Publish to push the menu to the DSP.
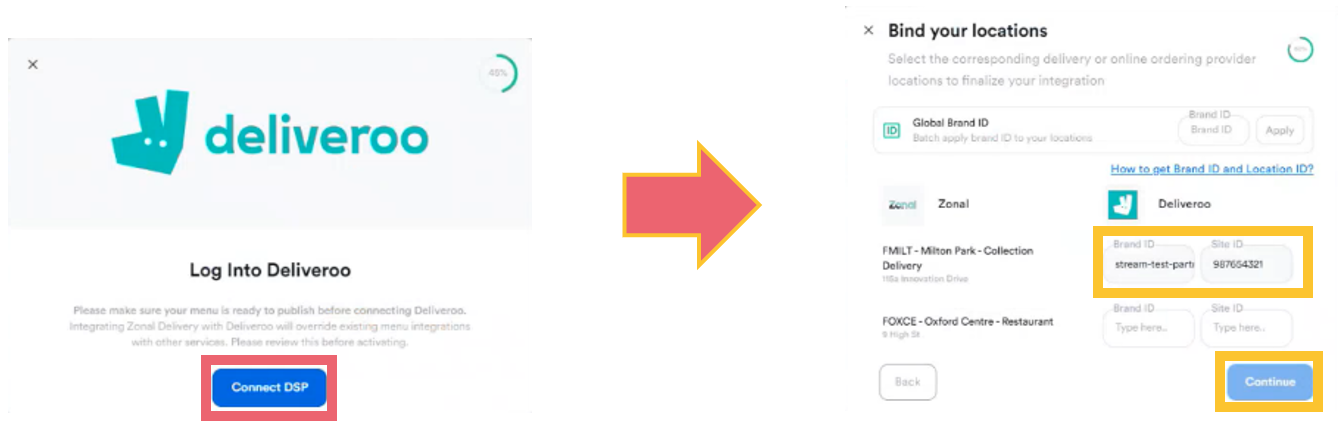
If at any stage you see an orange triangle on a DSP, there is a problem with the menu sync, and it will need to be re-published following the steps above.

Reviewing Prices across DSPs
View for allows you to review the prices for items on a menu for each DSP. Select the DSP you want to review to change the information displayed.

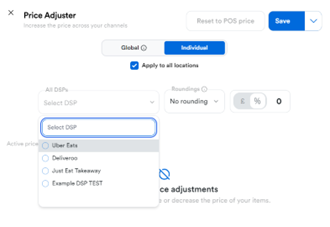
Adjusting Prices
Zonal Delivery allows you to adjust the price of items for each DSP without needing to make any changes in Aztec.
-
Select Adjust Price from the dashboard to begin.
- Select Global to adjust prices across all DSPs, or Individual to change a single DSP.
- If you are a multi-site operator you can tick the box to apply this change to all locations at once.
- Price adjustments can be increased as either a % or £ amount. Once the appropriate calculation has been selected you should add by how much you want the price to increase.
- Select Save to proceed and confirm if you want the change to apply to menu items only or items that have a modifier attached (this just means a product that has a Choice in Aztec).
- You can review any price adjustments that are active from the bottom of this screen.
- Select the X icon to remove any price adjustments that are no longer required, or alternatively, you can select Revert to POS price to cancel price changes.
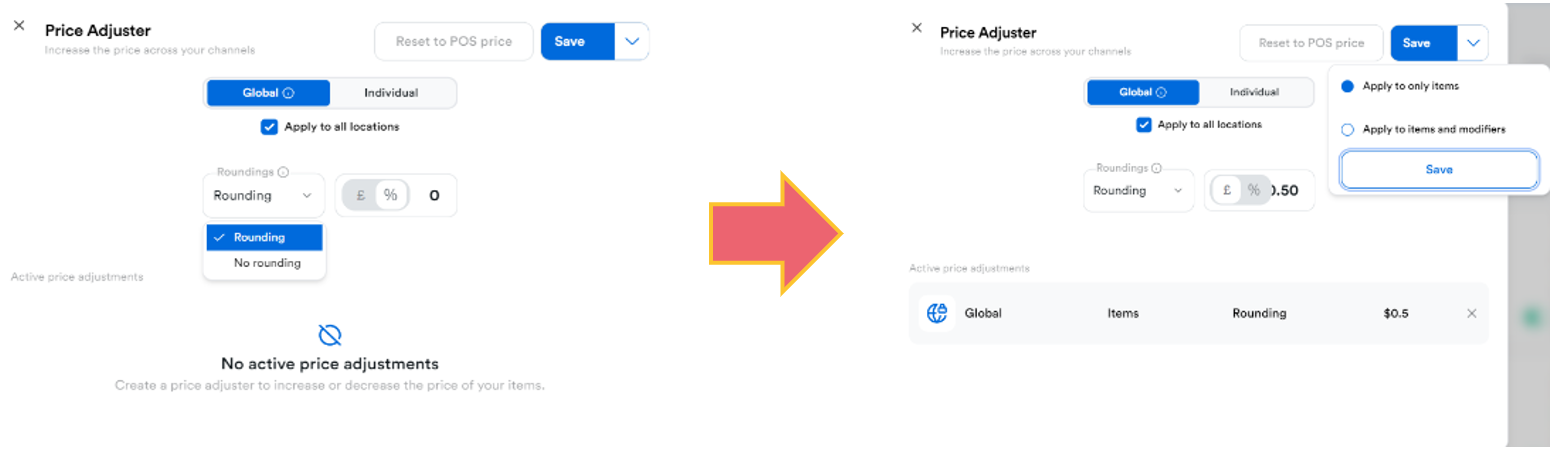
Selecting Rounding allows the calculation to round the figure up to the nearest whole amount
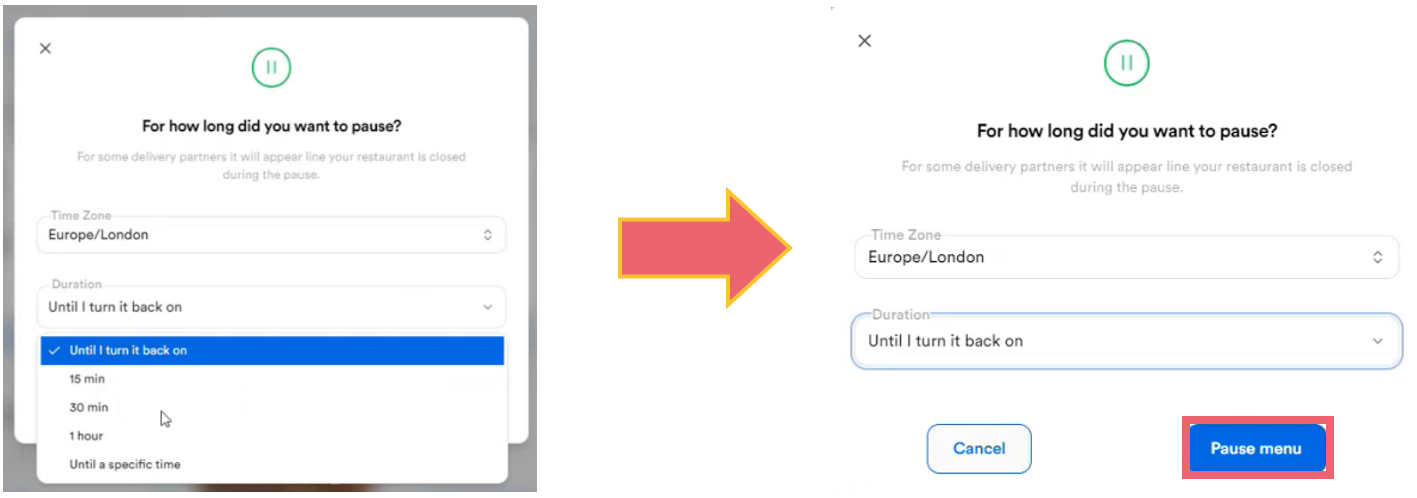
Pausing a Menu
Once a menu has been published to a DSP you can pause it if you need to remove it from your offering temporarily. This function can be used independently for each DSP as required.
-
Load the menu and select Pause Menu to begin
-
Select Pause
- Next, select the duration which will dictate when the pause is lifted, and the menu will return to being available.
- Select Pause Menu to confirm and enable.
- You can unpause the menu at any point by selecting Unpause which will override any previously selected duration and return the menu to being available to order from.


Adjust Prep Time
You can adjust the Prep Time for orders to allow sufficient time for an order to be prepared before the delivery driver arrives to collect. This also provides real-time information to the DSP to give your customers visibility of how long they will need to wait for the delivery of their order.
-
Select the Orders tab from the dashboard to begin, followed by Edit Prep time.
- Amend the Prep Time using the + and – symbols.
- Click Save to confirm.


The Prep Time can be adjusted at any point during the day to accommodate peak trading periods.
Availability
Zonal Delivery allows you to mark menu items or choices (Modifiers) within a menu item as unavailable.
You can use the toggles when a menu is loaded, or you can select All Items or All Modifiers from the Library section from the dashboard.
-
Select the required item or choice from the list and use the toggle switch to remove an item from menu visibility.
-
Now, a customer will not see this as an option, so will not be able to order it.
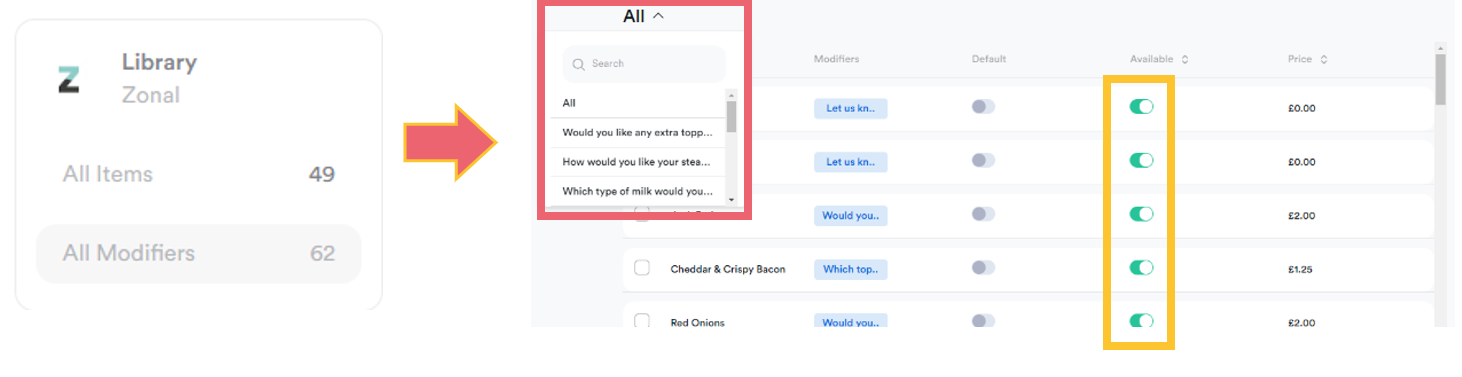
Note that 'how' the item is displayed as unavailable will vary depending on the DSP.
Active Orders
You can review the state and progress of active orders, as well as marking them as ready for pickup or dispatched.
-
From the home page, select Orders followed by Active Orders.
-
Select the tab containing the order state you want to view, including an estimated pickup time.
- All displays any active orders regardless of which state they are in.
- In Progress displays orders which are currently being prepared but are not yet ready for collection.
- Ready for pickup alerts a carrier that the order is ready to collect via the DSP. You can select Ready for Pickup to advance the state of the selected order
- Out for delivery indicates that the order has been collected and provides the DSP with live progress updates. You can select Out for Delivery to advance the state of the selected order.
- Failed indicates any orders that have experienced an issue and have not been successfully completed
The blue box at the bottom of an order allows the order state to be manually advanced, and the content will change depending on which tab you are looking at.
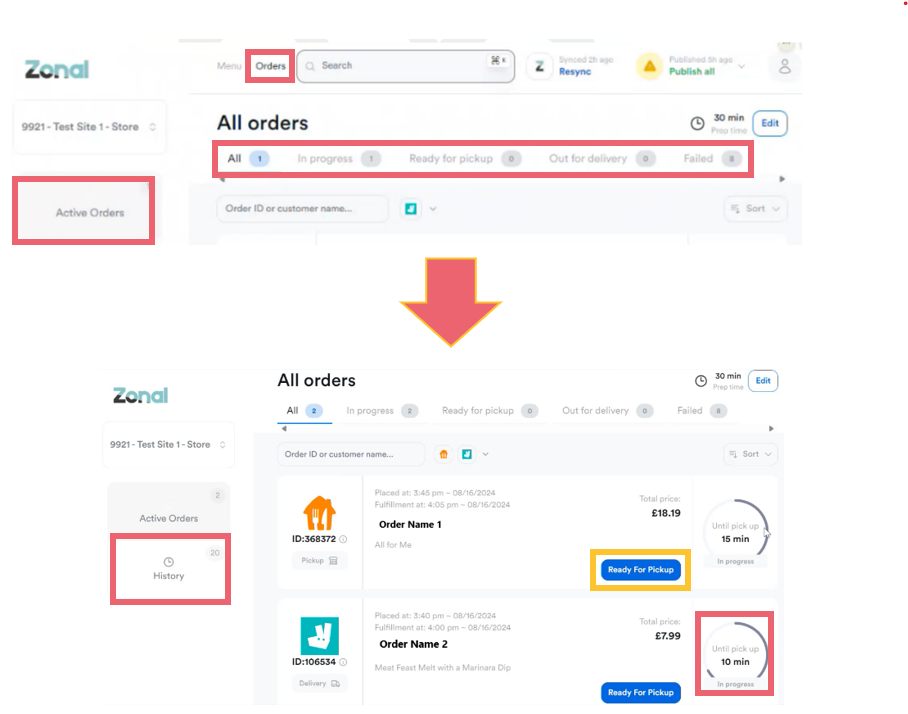
Order History
You can review a full history of orders that have been placed through Zonal Delivery regardless of which DSP has been used to fulfil the order.
Select the History tab to view:
-
All orders that have been processed through Zonal Delivery
-
Completed orders that have been fulfilled and successfully completed, including details of how long an order has taken to reach each order state.
-
Cancelled orders that have been cancelled through a DSP.
-
Failed orders that have been unsuccessful including a brief summary of the issue